An Ngrok Tutorial and Primer

Introduction to Ngrok >
This works because Ngrok is calling outbound, and meeting its other side on the internet.
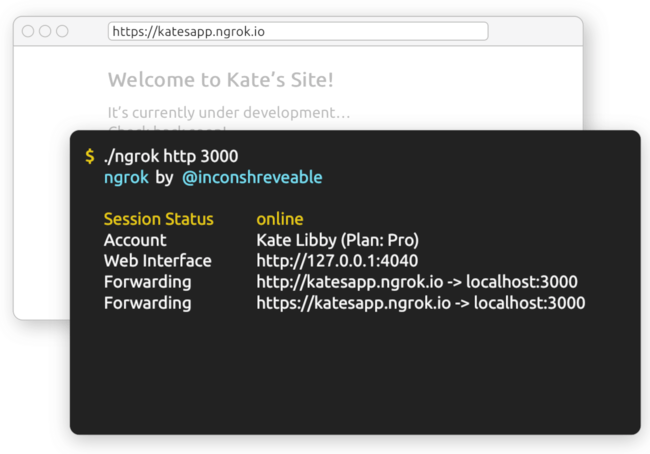
Ngrok > is an application that gives you external (internet) access to your private systems that are hidden behind NAT or a firewall. It’s basically a super slick, encrypted TCP tunnel that provides an internet-accessible address that anyone can get to, and then links the other side of that tunnel to functionality running local.
Here’s what it does:
You run ngrok from a local system with a service you want to make available to people on the internet
Just run the command and give it the protocol you want to use, along with the local port it’s listening on
Ngrok then creates an address in the cloud that people can get to
It then connects those two things over an encrypted tunnel, so when you hit the Internet address, you land on your local service automagically!
Just because hackers use something doesn’t make it automatically malicious.
Two of the examples they give on the site include: 1) public URLs for sending previews to clients, and 2) demoing local functionality with external people.
Those use cases are definitely cool, but if you’re in security like I am, the main benefit is granting external access to internal systems once you’ve, um, gained access.
Ngrok simplifies what used to require lots of trickery, usually involving SSH.
The other cool thing about Ngrok is that it allows you to see the HTTP traffic that’s being tunneled over it via a separate interface, which is by default hosted on http://127.0.0.1:4040. This especially helps the normies that are using it legitimately for testing and troubleshooting (?).
Basics >
Let’s say you have Apache or Nginx listening on localhost:80.
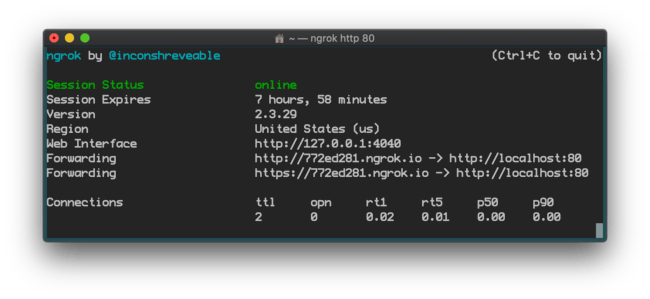
To start the application in the most basic mode possible, simply invoke it and tell it the port your local web server is running on.
ngrok http 80
By default Ngrok creates a random subdomain, but you can use the paid version to custom domains and subdomains.

Ngrok run with basic options
So with this one command you now have a public URL that you can hit from anywhere in the world—that will then access port 80 on your localhost. That’s epic.
Adding authentication >
Hand-washing after using the bathroom and a decent password are highly recommended.
If you’re going to make stuff behind the firewall (that may or may not have been compromised in some way) available to the internet, you might want to make some attempt to lock it down. You can do that with the -auth switch.
ngrok http -auth="youruser:yourpassword" 8181
This will at least make it so that people can’t just walk in the front door.
Forwarding to HTTPS servers >
This is different than the internet endpoint, which automatically has an HTTP option.
By default your targets are unencrypted (HTTP), so if you want to send to an internal server that uses TLS, you’ll have to specify that.
ngrok http https://localhost:8181
Tunneling SSH >
One of the most popular security (ab)use cases.
One of the most flexible things you can do—at least on a Linux-based host—is give yourself SSH access to the system. Because once you have SSH access you can do whatever else you need to from there.
Make sure SSH is running on the localhost, which is usually on port 22.
ngrok tcp 22
Tunneling RDP >
Keep in mind you can do this with any port, e.g., Postgres, MySQL, etc.
Hopefully with SSH and RDP you have authentication already on the landing point, but that says nothing about the quality of the credentials.
ngrok tcp 3389
Serving a directory >
Be careful with this, obviously.
You can also specify a local directory, and have that served via the web interface. Super slick. Super scary.
ngrok http http -auth="user:password" file:///Users/daniel/shared
Summary >
Ngrok is fantastic because it simplifies external access to internal things through the magic of outbound connections.
Tell Ngrok what to push up to the internet.
It gives you an internet place to go.
Go there an access the internal resource.
Beautiful.
TL;DR >
Always use authentication, especially where the endpoint doesn’t have it already.
For web developers wanting external access to an internal web server:
ngrok http 80
For security types wanting an external tunnel to an internal resource:
ngrok tcp 22
Enjoy!
Notes
The ngrok.io subdomains appear to have decent entropy, but I wonder if anyone’s trying to search for unsecured endpoints. Of course they are.
A friend and I were talking about how Ngrok (or any) connections to localhost:22 could be a decent IOC signal.
This tutorial will get you started, but the Ngrok documentation is some of the best I’ve ever seen on a tool, so more information definitely check that out. More >
Another thing to consider about Ngrok, similar to third-party VPNs, is that Ngrok is closed-source, so you should be aware of what you make available through it. It’s not that open-source automatically means secure, but when you shouldn’t have extreme trust in a closed-source, free tool that offers encrypted tunnels. They could do evil (for whatever reason), get compromised, etc. Not a red flag, but a yellow one.