Masscan Examples: From Installation to Everyday Use
Basic >
Basics
Everyone in information security > knows nmap > as the rightful king of the port scanners, and it still remains the most versatile option today. But for pure speed there have some that have surpassed it, including scanrand, unicornscan, zmap, and now masscan >.
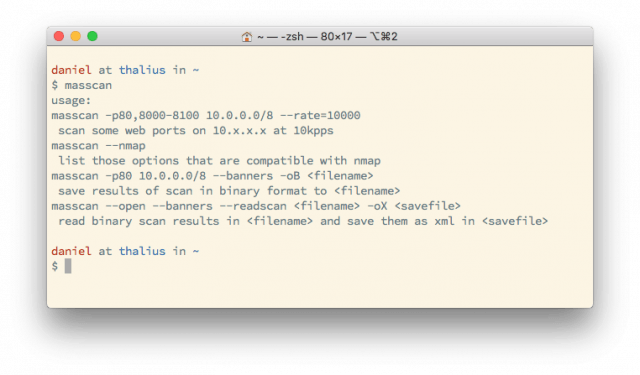
masscan run with no parameters
Asynchronous transmission means the scanner doesn’t have to wait for replies before sending out probes.
masscan was created for the sole purpose of scanning the entire internet as fast as possible, according to its author Robert Graham >, this can be done in less than 6 minutes at around 10 million packets per second.
In this short tutorial we’re going to learn the basics and provide some real-world examples.
If you just need syntax to run with you can jump ahead to the Quickstart >.
Installation
Installing masscan is fairly straightforward whether you’re using Linux or macOS.
This will install the binary under bin/masscan; you’ll have to move it to run it from somewhere else.
# Install on Debian/Ubuntu
$ sudo apt-get install clang git gcc make libpcap-dev$ git clone https://github.com/robertdavidgraham/masscan$ cd masscan$ make
brew is the main command for Homebrew, which you can get here >.
# Install on macOS
$ brew install masscan
Single-port Scans
Many people use masscan to scan very large networks (such as the internet) on one or just a few ports.
masscan has been designed to work much like nmap, which makes it instantly approachable for thousands of security professionals and enthusiasts.
# Scan a class B subnet for port 443
$ masscan 10.11.0.0/16 -p443
Multi-port Scans
You can also scan multiple ports using a comma as a separator.
# Scan a class B subnet for port 80 or 443
$ masscan 10.11.0.0/16 -p80,443
By default masscan only takes IP addresses as parameters. This script by @jhaddix >will let you scan a domain (translated to IP) instead.
Scan a Range of Ports
Or you can scan a range of ports using the dash.
# Scan a class B subnet for ports 22 through 25
$ masscan 10.11.0.0/16 -p22-25
Scan n Number of nmap‘s Top Ports
In addition you can use nmap’s ‐‐top-ports option, which lets you specify the top n number of the most common ports to scan. So if you give it ‐‐top-ports 100 it’ll scan the top 100 most common ports discovered according to nmap.
If you don’t have the ‐‐top-ports option available to you, make sure you have the latest version of masscan.
# Scan a class B subnet for the top 100 ports
$ masscan 10.11.0.0/16 ‐‐top-ports 100
Options
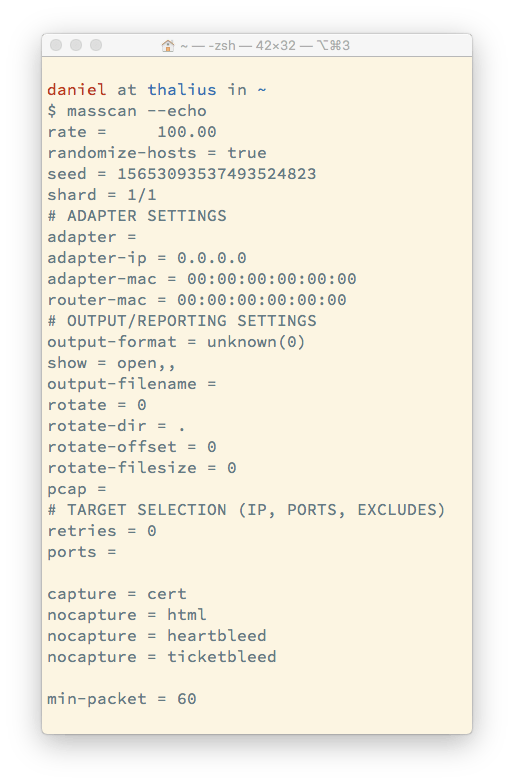
The default masscan options
You can check masscan’s options with the ‐‐echo switch.
Now that we’ve covered some basics, let’s look at some additional tweaks we can make.
Scanning Fast
Using the settings above you’ll definitely get results, but the speed will be quite average. As discussed already, the whole point of masscan is to be quick, so let’s speed it up.
By default, masscan scans at a rate of 100 packets per second, which is quite slow. To increase that, simply supply the ––rate option and specify a value.
# Scan a class B subnet for the top 100 ports at 100,000 packets per second
$ masscan 10.11.0.0/16 ‐‐top-ports 100 ––rate 100000
Scanning this fast (or even slower) is likely to cause all sorts of problems, including getting your system blocked on the internet, getting abuse complaints to your hosting provider, etc. Don’t just start scanning large networks without setting groundwork first.
How fast you can scan is going to depend on a lot of factors, including your operating system (Linux scan scan far faster than Windows), the resources of your system, and—most importantly—your bandwidth. In order to scan very large networks at high speeds you’ll need to use rates of a million or more (––rate 1000000).
Excluding Targets
Because much of the internet can react poorly to being scanned—and also just out of sheer courtesy—you may want or need to exclude some targets from your scans. To do this, provide the --excludefile switch along with the name of the file that includes lists of ranges to avoid.
# Scan a class B subnet, but avoid the ranges in exclude.txt
$ masscan 10.11.0.0/16 ‐‐top-ports 100 ‐‐excludefile exclude.txt
This will produce the notification at the top of your scan that:
exclude.txt: excluding 1 range from file
Saving Your Configuration
As we mentioned earlier, you can show the current masscan options using --echo, but you can also save them to a file using the standard method.
# Scan a class B subnet, but avoid the ranges in exclude.txt
$ masscan 10.11.0.0/16 ‐‐top-ports 100 ‐‐echo > scan.txt
Output
First, you can just use the standard Unix redirector to send output to a file:
$ masscan 10.11.0.0/16 ‐‐top-ports 100 > results.txt
But in addition to that you also have the following output options:
-oX filename: Output to filename in XML.
-oG filename: Output to filename in Grepable format.
-oJ filename: Output to filename in JSON format.
Nmap Functionality
As mentioned initially, masscan is built to work much like nmap, which makes it familiar to many security people. Here are some of the other nmap-like options that are available:
You can see the nmap-like functionality by passing the --nmap switch.
-iL filename: Read inputs from a file.
‐‐exclude filename: Exclude a network on the command line.
‐‐excludefile: Exclude networks from a file.
-S: Spoof source IP.
-v interface: Verbose output.
-vv interface: Very verbose output.
-e interface: Use specified interface.
-e interface: Use specified interface.
Quickstart
Ok, here are some quick and functional scan examples that you can start with and then tweak to your taste and requirements.
We’re assuming here that you want to scan quickly.
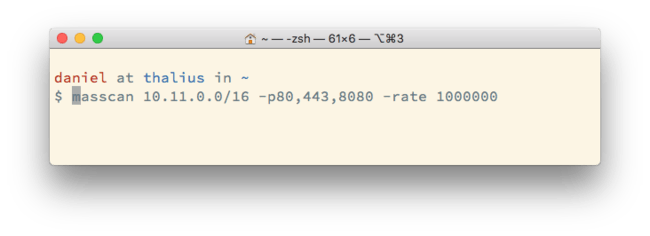
Scan a Network for Web Ports
$ masscan 10.11.0.0/16 -p80,443,8080 ––rate 1000000
Scan a Network for the Top 10 Ports
$ masscan 10.11.0.0/16 ‐‐top-ten ––rate 1000000
Scan a Network for All Ports
$ masscan 10.11.0.0/16 -p0-65535 ––rate 1000000
Scan The Internet for A Port
We’ve increased the speed to 10 million per second, which will max you out.
$ masscan 0.0.0.0/0 -p443 ––rate 10000000
Scan The Internet for All Ports
In general you should expect bad and/or amazing things to happen if you try this.
$ masscan 0.0.0.0/0 -p0-65535 ––rate 10000000
Summary
There are other options available that you can get from following the readme.md > for the source code repository, but this primer should get you up and running nicely.
Happy (speed) scanning!
Notes
There are number of defaults that are enabled with masscan that need to be defined with nmap simply because the scanners work in different ways. For example, masscan always treats all hosts as online, scans are always randomized, it’s a SYN-based scan, it never does DNS resolution, and scans are performed using raw libpcap.
One thing that’s fairly unique to masscan is that you can easily pause and resume scans. When you press ctrl-c a file is created called paused.conf that has all the settings and progress from the scan. You can resume that scan with ‐‐resume paused.conf.
The project readme >.