AI's Morose Mania
The more excited we are as developers, the more we have to worry about knowledge workers

It’s annoying to me that package managers are so bad at deploying Intrusion Detection systems like Snort and Suricata. They never seem to work the way they should, so I prefer to build from source and configure them myself. And it’s actually super easy.
Here’s how to go from nothing to a working Suricata install—on any modern Linux system—in just minutes.
It will be here: https://suricata-ids.org/download/ (download the Linux version, which is a tarball).
tar xvzf suricata-$VER.tar.gz
[ NOTE: We will now refer to whatever your directory is named (based on version) as suricata-dir. ]
cd suricata-dir
There are some great built-in options for doing lots of configuration automatically, such as creating the required directories, building your suricata.yaml file, and downloading the latest Emerging Threat ruleset.
./configure –prefix=/usr –sysconfdir=/etc && make && make install-full
You don’t want to run your IDS as root because…well, because parsers.
So let’s do some hygiene real quick to run as an unprivileged user:
# Create our user
adduser suri
# Create our group (might already exist)
addgroup suri
# Add user to our group
adduser suri suri
# Give our user rights to log
Get a weekly breakdown of what's happening in security and tech—and why it matters.
chown -R suri:suri /var/log/suricata/
Now that we’re installed, we can just run the IDS and put it in daemon mode.
LD_LIBRARY_PATH=/usr/local/lib /usr/local/bin/suricata -c /etc/suricata/suricata.yaml -i eth0 -l /var/log/suricata –user=suri –group=suri -D
This will:
Start the IDS using the config file we just created
Use the eth0 interface
Set the IDS to run as suri instead of root
Log to /var/log/suricata/fast.log
Now that we’re running, we should have logs to look at.
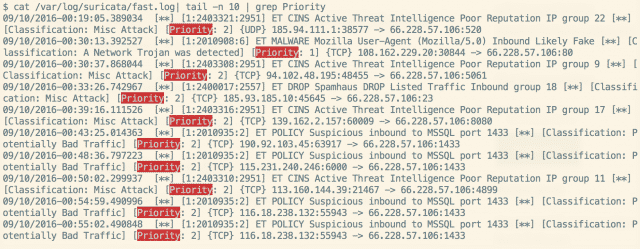
tail -f /var/log/suricata/fast.log
If you have a busy server you should see logs come in fairly quickly. If you don’t have a busy server, and you want to test if it’s working, scan the box with nmap and you should see some events.
Ok, that’s how to get a working IDS installation on a Linux box in less than 5 minutes. It works on any Linux distro because it’s source-based instead of package-based.
In the next part of this series I’m going to talk about how to:
Keep your ruleset up to date
Do some cool stuff with your logs
Set up alerts for high-priority events
More!