The Ultimate Speed Guide for WordPress on NGINX

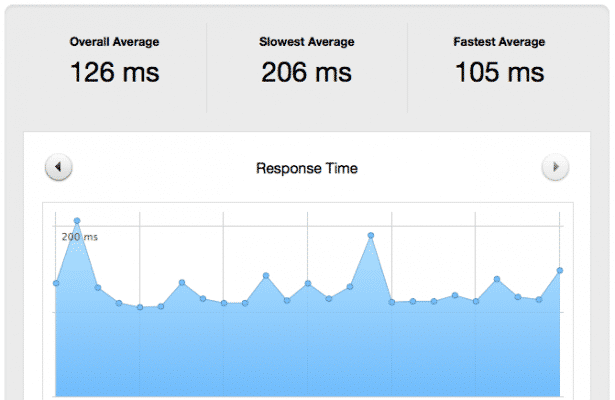
I typically serve web pages from my my Nginx/Wordpress-based stack > in 100-300ms, and enough people have asked me about how I do it that I decided to write it up.
In this tutorial I’m going to talk about the entire stack: from hosting, to Nginx, to WordPress, to DNS management, to CDN, security—everything.
Follow this and your site will blast the way mine does.
Philosophy >
Let’s start with a solid philosophy > for creating a fast website, in bullet form:
Keep requests to a minimum
Use a fast server (both hardware and network)
Cache as much as possible (see #1)
Optimize content (minimization/compression/etc)
Leverage high-quality network services (DNS/CDN/etc)
That’s the basic idea, but there’s more here > if you’re interested. If I had to summarize into a word, though, it’d be simplicity. Make your website as simple as possible, with high-quality ingredients.
Now let’s build it.
Hosting >
Everything starts with your host. If you make a poor choice here you’ll be urinating into a headwind. First things first, don’t use a legacy (shared) host (where you don’t have root). Use a VPS.
I use Linode. They’re phenomenal. I hear good things about Digital Ocean as well, though. Picking one of those will be a good choice.
The main things I look for in a VPS today are SSD (spinning disks are for museums), and plenty of memory. My current host/plan has 8GB, but you can get away with 2 or 4.
Ok, let’s say we’re on Linode. Now let’s install our web server.
Nginx >
Use Nginx. It’s better. That’s all I’ll say about that. Ok, not really. Nginx is infinitely simpler than Apache. It’s designed to run slim, clean, and fast. We like that.
Installing Nginx >
To install it, you can just use yum or apt to install your favorite distro’s packaged version, but I prefer to install from source.
wget http://nginx.org/download/nginx-1.6.0.tar.gz gunzip nginx-1.6.0.tar.gz tar xf nginx-1.6.0.tar cd nginx-1.6.0 [ NOTE: You’ll want to change the version accordingly, of course. ]
We want to install Nginx with some key modules, so we need to go get those
first:


    Nginx Cache Purge
    >


    Add Headers
    >
[ NOTE: wget those to the Nginx install directory… ]
./configure --add-module=./ngx_cache_purge --add-module=./headers-more-nginx-module-0.25 make make install [ NOTE: I’ll talk about the modules later. ]
Also note that you’ll need PHP to do all this we’re talking about here. I
suggest using PHP-FPM. I won’t be talking about setting that up because this
thing is going to be long enough already.


Basic Nginx Configuration
>


Ok, now that we have Nginx installed, let’s do some basic configuration.
This will get us plenty of power for incoming users (to avoid being melted
by being on Reddit or Hacker News, for example).
This is in your main Nginx configuration file.
user nouser; worker_processes 6; pid /var/run/nginx.pid; events { worker_connections 1024; multi_accept on; }
[ NOTE: Keep in mind that caching and other stuff will matter more
than these settings in the end. ]
Now let’s add some more basic settings:
sendfile on; tcp_nopush on; tcp_nodelay on; keepalive_timeout 10s; types_hash_max_size 2048; server_names_hash_bucket_size 64; include /etc/nginx/mime.types; default_type applicaiton/octet-stream;
Basic compression settings:
gzip on; gzip__vary on; gzip_proxied any; gzip_comp_level 9; gzip_buffers 16 8k; gzip_http_version 1.1; gzip_types text/plain text/css application/json applicationx-javascript text/xml application/xml application/xml+rss text/javascript;
And now we’ll load our configuration files:
include /etc/nginx/*.custom
Caching
>
Ok, now we’re going to talk about caching.
Caching is absolutely critical if you care about speed, as it directly
relates to our first rule of fast websites:
reduce the number of requests going to and from your server.
There are two basic kinds of caching that do this:
    Client-side caching reduces the number of requests that go
    to your web server


    Server-side caching reduces the number of requests that go to your
    backend (php, database, etc)
We’ll be talking about both.
Caching in Nginx
>


Some caching will be done right in Nginx itself. This caching is pretty
self-explanitory, and deals with how long clients should assume content is
good for (and not request it again):
location ~* .(ico|jpg|webp|jpeg|gif|css|png|js|ico|bmp|zip|woff)$ { access_log off; log_not_found off; add_header Pragma public; add_header Cache-Control "public"; expires 14d;
Then another one for your main files (notice this one logs, while the one
above doesn’t):
location ~* .(php|html)$ { access_log off; log_not_found off; add_header Pragma public; add_header Cache-Control "public"; expires 14d;
Fast-CGI Caching
>


Ok, so Pagespeed mostly deals with optimizing and compressing of content
that gets served to users so that 1) the stuff is cached correctly on users’
machines so they don’t ask for it too often, and 2) so that the actual
delivery to users is more efficient (smaller images, minified and compressed
JavaScript and CSS, etc).


Perfect. Now we’re going to set up the other kind of caching (server side)
using PHP Fast-CGI.
Go back to your main Nginx config file, and add this in there:
fastcgi_cache_path /dev/shm/nginx levels=1:2 keys_zone=stupidfast:16m max_size=1024m inactive=60m;
This sets up a couple of things:
The path to your cache files

  The name of your cache (stupidfast, of course)

Your cache sizes
Expiration information
Fair enough.
Now we’ll head back to your custom Nginx file (the virual host, or wherever
you have your server directive:
fastcgi_pass_header Set-Cookie; fastcgi_pass_header Cookie; fastcgi_ignore_headers Cache-Control Expires Set-Cookie; fastcgi_index index.php; fastcgi_param SCRIPT_FILENAME
This covers caching bypasses:
fastcgi_no_cache $no_cache; fastcgi_cache_bypass $no_cache; fastcgi_cache drm_custom_cache; fastcgi_cache_key
Expiration and sizes:
fastcgi_cache_valid 404 60m; fastcgi_cache_valid 200 60m; fastcgi_max_temp_file_size 4m; fastcgi_cache_use_stale updating;
The all-important line that tells the cache to send requests backward into
PHP if there’s no cache entry:
fastcgi_pass localhost:9000;
PHP Opcaching
>


Opcaching is caching that’s part of PHP itself. This used to be handled by a
package called APC, but that’s been deprecated in favor of PHP Opcache.


The Opcache works by caching small fragments of PHP that are core to your
application’s operation. So let’s say you have a big framework (like
WordPress), and some files are part of nearly every call. Well, those get
cached using the Opcache, which means far fewer hits on PHP itself.


This one is pretty simple to install: Just use your package manager. It’ll
be something like "php5-opcache", etc. Shouldn’t be too hard to find and
install using yum or apt. There’s no real config there, so you’ll be good to
go once you’re installed.


In-memory Caching
>
Pop-quiz: Answer: Memory
We’ve talked about two different paths for cache files so far: One for
Pagespeed, and another for Fast-CGI. What we want to do here is make sure
that those systems are caching to RAM instead of disk.
Sick fast it is.
Modern Linux distros have their own RAMDisks already set up by default. For
CentOS it’s under /dev/shm/, and for Ubuntu it’s under /var/run/. Go forth
and cache there (shown above in the Fast-CGI section).


WordPress
>
I’m not sure what to say about WordPress.
Install it
>, basically. If you’re following this tutorial, installing WordPress should
be dead simple, so I won’t go into it.


Network Acceleration
>


We’ve talked a good amount about what you can do to your server to make your
WordPress-based site as fast as possible. Now let’s talk about what we can
do elsewhere to make it pop even more.


Optimizing DNS
>
DNS is the elixir of web life. Use a good DNS host. I recommend DYN.
And if you’re serious (see insane), go with Anycast DNS like I do. Anycast
DNS means that users can resolve your site really fast because the answer
will come from right next to them—no matter where they are in the world.


Anycast DNS services are more expensive, but they’re worth it if you’re
counting milliseconds like I am.


Using a Real CDN
>


The final step in maturity for a site is combining ultimate simplicity and
optimization with the use of a world-class CDN. CDNs (Content Delivery
Networks) host your static files (CSS/JS/Images) on their various points of
presence around the world, and when someone asks your site for them, they
get served from the closest location to them.


That’s the configuration I’m currently running, and it’s brutal fast. I use
CacheFly, as they were widely recognized as the fastest and best out there
when I looked into it a few months back.
MaxCDN is another good one.
Security
>
And now we arrive at security. This is my jam.
I suppose we’ll start with the fact that it’s not possible to "secure"
WordPress. WordPress is an open wound. Even worse, it’s an open wound inside
of another open wound (PHP).


You should always assume your site is hackable via any number of
undiscovered or undisclosed vulnerabilities. This is always the case with
any technology, but where PHP and WordPress are concerned it’s especially
true.


Don’t misunderstand: I love WordPress. I think it’s a phenomenal CMS. But as
a security professional with particular focus on web technologies…yeah…PHP
and WordPress are menacingly sub-optimal (although they are improving).


Updates are Critical
>


If you don’t make any security improvements to WordPress, at least keep it
updated. Out of date WordPress is an attacker’s lotter-winning holiday, and
bad news for you.
Keep it up to date. Religiously.
Plugins are Evil
>
The only thing more insecure than WordPress is WordPress plugins.
My Nginx and WordPress configuration is designed to run as few plugins as
possible, and ideally none. But if you do run plugins, run very few,
and try to follow these rules:


    Try to run plugins that don’t process input from the web. Those are the
    most dangerous kind. If you have a plugin that does something with user
    input, that’s the type of thing that’s most likely to get you hacked.
    Safer plugins are things that only work when you perform a certain
    action, and aren’t related to user input from the web.


Keep your plugins updated.


    #1 was mentioned for security reasons, but it also applies to
    performance. Plugins that are in-line with web traffic can slow things
    down drastically. Avoid them. Violently.


Use a Strong Password
>


WordPress sites are big targets. If you saw how many people are trying to
log into the average WordPress site on a regular basis, you’d probably wad
up into a ball and suck your thumb. It’s constant, on any site that’s been
out there for a while.
I’ve had 147 attempts while writing this post. Your top defenses are simple enough:
    Don’t write posts as, or otherwise use, the admin account. Put a nuclear
    password on that user and never use it


  Create a new account and use that to write your posts


    Use a good password for that account. Over eight (8) characters, upper
    and lowercase letters, at least one number, and don’t use common or
    predictable groups of letters if you can avoid it.


The odds of anyone walking through your front door if you do those three
things are extremely low. People’s WordPress sites get hacked because they
left the front door wide open, or they took the door with them before they
left (admin/password for credentials, for example).


Additional Security Settings
>


I also have some other security options in my Nginx config. Here I define a
bunch of stuff we shouldn’t cache:
set
if ($request_uri ~* "/(wp-admin/|wp-login.php)") { set $no_cache 1; }
if ($http_cookie ~* "wordpress_logged_in_") { set $no_cache 1; }
Let’s also make sure people can’t browse to certain files:
location ~ /(.|wp-config.php|readme.html|licence.txt) { return 404; }
We’re also only going to allow only three methods:
if (
And we’re going to make sure people can’t browse dotfiles (is that a word?):
location ~ /. { deny all; }
And here we avoid a bit of information disclosure:
server_tokens off; server_name_in_redirect off;
Extras
>


Ok, now that we have the fundamentals handled, let’s round it out with some
spice.


Editing the Site with Vim
>


I edit my entire site—both posts and pages—in
Vim
>. I did a write-up on how I do this
here
>.


[
Editing Your WordPress Blog Using WordPress
>
]


Automatically Purging Nginx’s Caches When You Update
>


One thing that can be annoying about running caches is that you can get out
of sync with what the latest version of your content is vs. what’s being
displayed.


You know how I feel about plugins, but in keeping with the primary rule
(don’t be inline), I recommend considering the
Nginx Plugin
>
that enables automatic cache purging when you update posts or pages.


Be sure to add this to your wp-config.php (with your appropriate cache path)
so that the plugin will clear the right files:
define('RT_WP_NGINX_HELPER_CACHE_PATH','/dev/shm/nginx/'); }
Modifying Your Headers
>


This one is part security (avoiding information disclosure), and part fun.


It’s just plain amusing to have someone scan your website and have the
server show up as Windows ME. Plus it’s enjoyable to have people ping you
and say they got a chuckle from them.
It just gives the site some personality, for anyone who notices.
Anyway, you can do this using the header modification we talked about and
that was enabled by our compile options. First some header stripping:
more_clear_headers 'Server'; more_clear_headers 'X-Powered;
Then adding some headers:
more_set_headers 'X-Backend-Server: Windows 98 SE';
more_set_headers 'X-Hacker: Too easy, please move along.';
more_set_headers 'X-Powered-By: Curiosity/Coffee';
more_set_headers 'X-Security: Um...you see I run PHP, right?';
more_set_headers 'X-Contact: danielmiessler.com/connect/';
more_set_headers 'X-Firewall: Dual-homed Windows ME';
more_set_headers 'X-WAF: Epic regex.';
Like I said, just a bit of fun.
Testing Your Site >

It’s unproductive to simply "think" or "feel" like your site is faster. Test. Test. Test. I’ve a resource here that will give you plenty of data on how your site is doing, and how it compares to others.
[ The Top Ways to Test Your Website Performance > ]
Finito
Alright. That was a lot to cover, but if you’ve done these pieces here you’re likely to have a ridiculously fast website. Here are my final configs for reference:
[ My Nginx Config Repo > ]
[ My Nginx Server Config > ]
[ My Nginx Site Config > ]
[ My Github > ]
I’ve got more advanced stuff to add to this writeup, actually, but I think I’ll save it for the next installment. Until then, enjoy your fast website.
Notes
I’ve purposely been somewhat vague about Nginx file locations since there are so many possibilities based on your distro and your config. Again, this is assuming you’re already up to speed on doing basic Nginx stuff. Ping me with any questions.
I had Google’s Server-installed modification (also called Pagespeed) installed and included above, but did a bunch of testing on it and determined it to be far inferior than running Nginx by itself. It basically fell over hard when hit with a high number of requests. I recommend you avoid it and stay with a pure Nginx/Fast-CGI solution.