Learn Vim For the Last Time
This guide will break that cycle, ensuring this is the last time you will learn it. There are dozens of Vim references online, but most of them either go ninja straight away, or start basic and don't go much deeper.
There will always be plenty more Vim to learn, but you'll never have to start over again.
This guide will take you through three levels—from:
- Understanding Vim's philosophy, which you'll never forget
- Surpassing your skill in your current editor
- Becoming one of those people
In short, we're going to learn Vim in a way that will stay with you for life.
Let's get started.
Why Vim
I believe people should use Vim for the following three reasons:
- It's ubiquitous. You don't have to worry about learning a new editor on various boxes.
- It's scalable. You can use it just to edit config files or it can become your entire writing and coding platform.
- It's powerful. Because it works like a language Vim takes you from frustrated to demigod very quickly.
You should consider competence with Vim the way you consider competence with your native language, or basic maths, etc. So much in technology starts with being good with your editor.
Approach
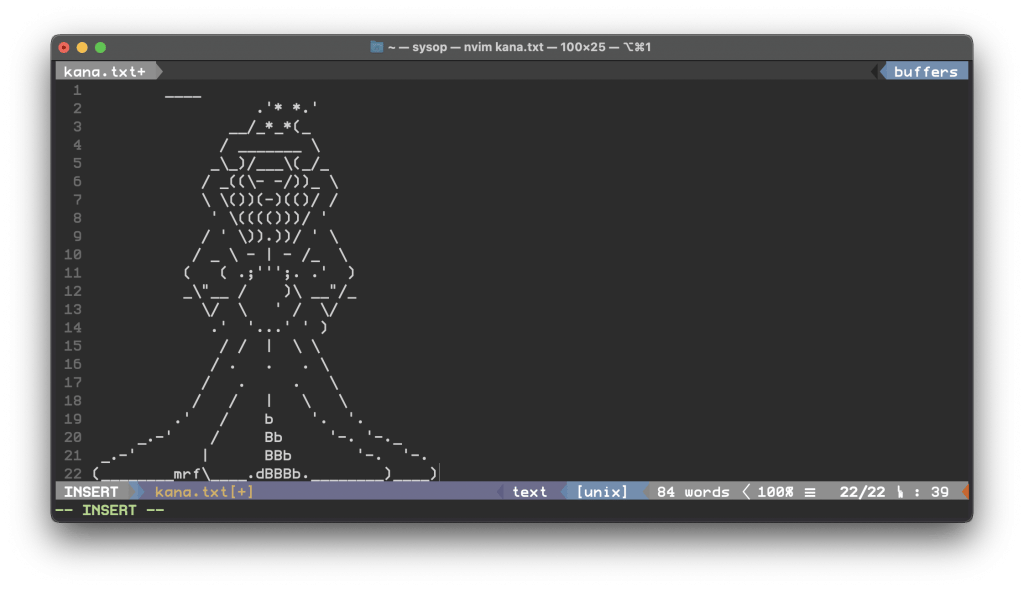
Kana the Wizard says there are five (5) levels to Vim mastery:
Level 0: not knowing about Vim
Level 1: knows Vim basics
Level 2: knows visual mode
Level 3: knows various motions
Level 4: not needing visual mode
I don't know about that, but I thought it was worth mentioning. Kana's a wizard, after all. My approach to showing you Vim is based around four main areas:
- Intro/Basics: understanding how to think in Vim.
- Getting Stuff Done: this is the meat. Bring a fork. And probably a napkin. You seem messy.
- Advanced: this is where I show you how to become one of "those people" with Vim.
- Frequent Requests: this is where I give you the tricks to do that one thing you need.
In other words, if you're already up and running you should be able to jump to Getting Stuff Done and start knocking stuff out. If you're already solid on those bits, then head over to the Advanced section to learn Kung Fu. And if you're here to solve a specific "forgot how do do that one thing", check out the Frequent Requests area.
So, setup, basic usage, ninja stuff, and then frequent tasks—and you basically just go where you need to within those.
Configuration
This isn't an uber-vim-config piece. There are many of those out there. This is a guide that will teach you Vim's way of thinking so that you gain long-term power with it. But we'll talk through some configuration basics as part of that.
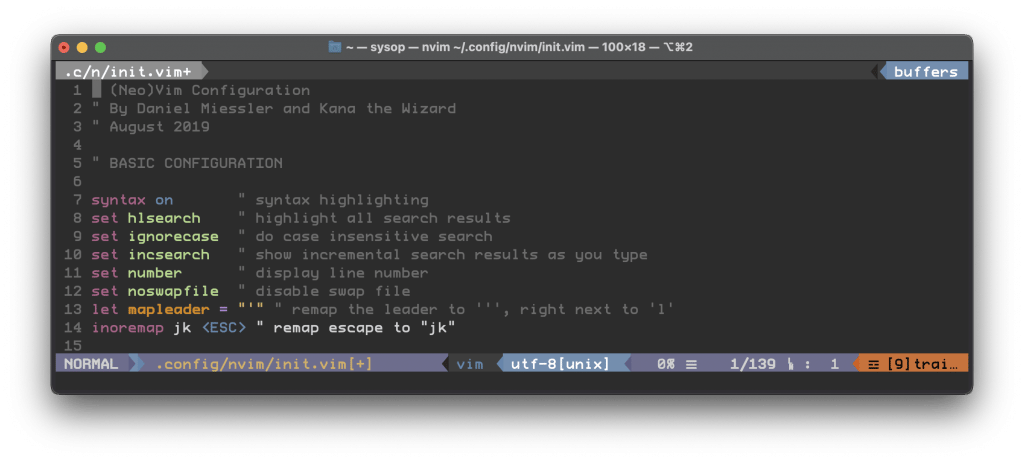
I recommend you start pretty basic and go from there, but I do have a couple of key recommendations that you can take or ignore. After installing Vim by editing your main Vim config file, which is located at ~/.vimrc.
vi ~/.vimrcA few key ~/.vimrc changes
- Remap the ESC Key: Firstly, the key for leaving insert mode is—in my opinion—rather antiquated. Vim is about efficiency, and it's hardly efficient to leave the home keys if you don't have to. So don't.
This will make it so that you can type jk instead of pressing ESC, which is much easier since they're home keys!
inoremap jk ⟨Esc⟩- Change Your Leader Key: The leader is an activation key for shortcuts, and it's quite powerful. So if you are going to do some shortcut with the letter "c", for example, then you'd type whatever your leader key is followed by "c". By default it's the \ key, which is a bit out of the way, so I like to map it to the "'" key, which is right to the right of the "l" key on your right pinky.
let mapleader = "'"With these two quick mods you can move through all your major Vim workflows without having to move your left or right pinkies from the home row.
The next few are just nice to haves that are a solid start for any .vimrc.
syntax on              " highlight syntax
set number             " show line numbers
set noswapfile         " disable the swapfile
set hlsearch           " highlight all results
set ignorecase         " ignore case in search
set incsearch " show search results as you typeRemapping CAPSLOCK
This one isn't in your Vim config file, but it's an important deviation from the defaults. The CAPSLOCK key on a keyboard is generally worthless to me, so I remap it to Ctrl at an operating system level. This way my left pinky can simply slide to the left by one key to execute Ctrl-whatever.
Plugin management
I recommend keeping your plugin management as natural as possible, which really just means avoiding complex third-party functionality that manages them for you. This is much easier to do now in Vim 8.x, and in NeoVim. You simply drop your plugins under:
~/.vim/pack/pluginfoldername/start/pluginnameDone and done. Now you can play with any plugins you want using the method above and they will be loaded automatically when Vim starts. I much prefer this to the third-party plugin management options we needed with earlier versions of Vim.
Vim as Language
Arguably the most brilliant thing about Vim is that as you use it you begin to think in it. Vim is set up to function like a language, complete with nouns, verbs, and adverbs.
Verbs
Verbs are the actions we take, and they can be performed on nouns. Here are some examples:
- d: delete
- c: change
- y: yank (copy)
- v: visually select (V for line vs. character)
Modifiers
Modifiers are used before nouns to describe the way in which you're going to do something. Some examples:
- i: inside
- a: around
- NUM: number (e.g.: 1, 2, 10)
- t: searches for something and stops before it
- f: searches for that thing and lands on it
- /: find a string (literal or regex)
Nouns
In English, nouns are objects you do something to. They are objects. With Vim it's the same. Here are some Vim nouns:
- w: word
- s: sentence
- ): sentence (another way of doing it)
- p: paragraph
- }: paragraph (another way of doing it)
- t: tag (think HTML/XML)
- b: block (think programming)
Nouns as motion
You can also use nouns as motions, meaning you can move around your content using them as the size of your jump. We'll see examples of this below in the moving section.
Building sentences (commands) using this language
Ok, so we have the various pieces, so how would you build a sentence using them? Well, just like English, you combine the verbs, modifiers, and nouns in (soon to be) intuitive ways.
Here's what it looks like:
# Delete two words
d2w

# Change inside sentence (delete the current one and enter insert mode)
cis

# Yank inside paragraph (copy the paragraph you're in)
yip

# Change to open bracket (change the text from where you are to the next open bracket)
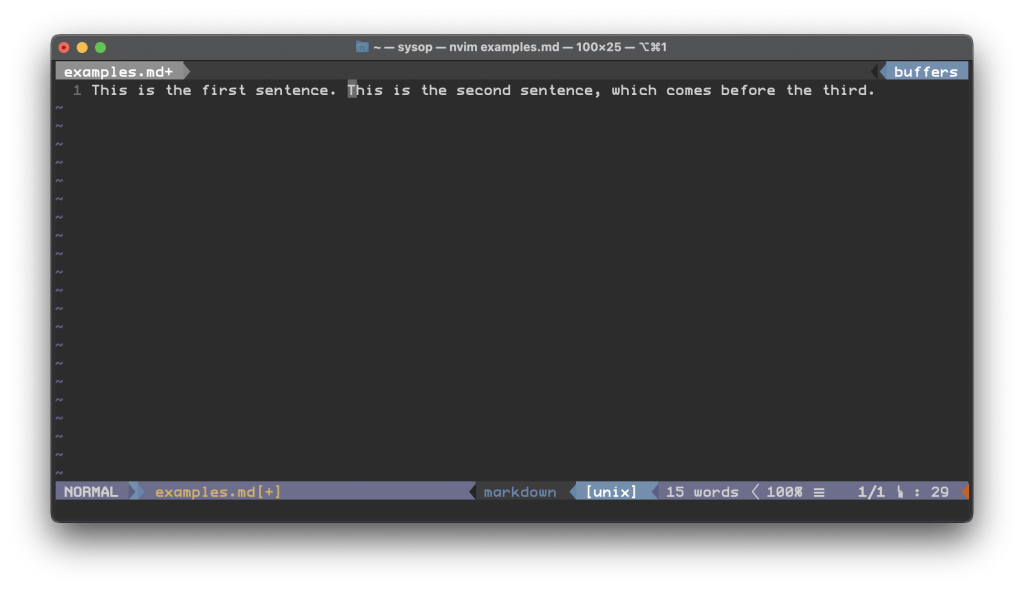
ct<Remember, the "to" here was an open bracket, but it could have been anything. And the syntax for "to" was simply t, so I could have said dt. or yt; for "delete to the next period", or "copy to the next semicolon".
Getting Things Done
Now that we've handled some fundamentals, let's get tangible and functional.
Working With Your File
Some quick basics on working with your file.
- vi file: open your file in vim
- :w: write your changes to the file
- :q!: get out of vim (quit), but without saving your changes (!)
- :wq: write your changes and exit vim
- :saveas ~/some/path/: save your file to that location
- ZZ: a faster way to do :wq
Searching Your Text
One of the first things you need to be able to do with an editor is find text you're looking for. Vim has extremely powerful search capabilities, and we'll talk about some of them now.
Searching by string
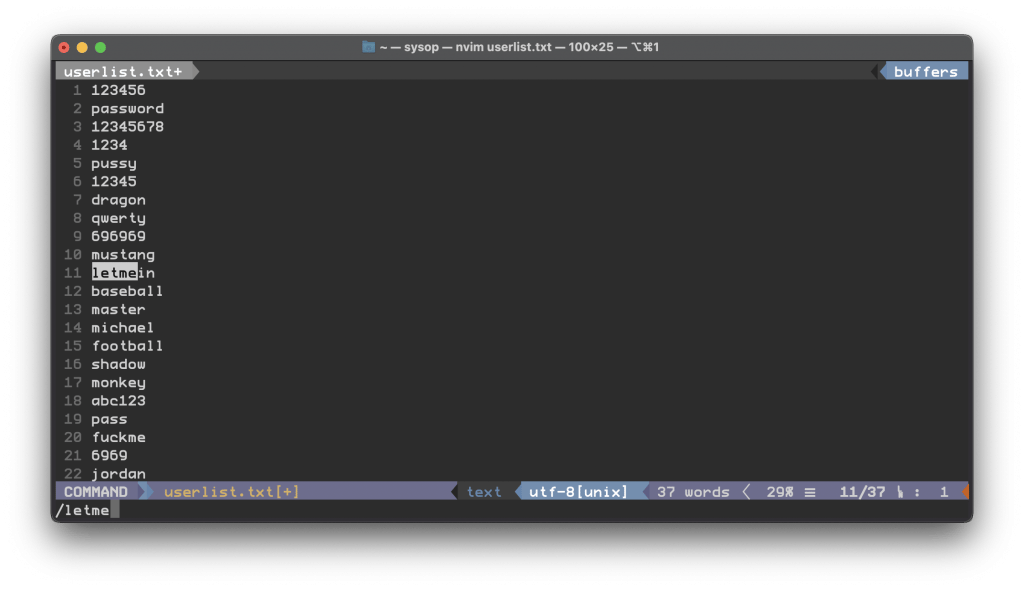
One of most basic and powerful ways to search in Vim is to enter the "/" command, which takes you to the bottom of your window, and then type what you're looking for and press ENTER.
# Search for include
/includeThat'll light up all the hits, as seen below:
Once you've done your search, you can press "n" to go to the next instance of the result, or "N" to go to the previous one. You can also start by searching backward by using "?" instead of "/".
Jumping to certain characters
One thing that's brutally cool about Vim is that from anywhere you can search for and jump to specific characters. In this article, for example, because I'm editing HTML, I can always jump to the "<" character to be at the end of the sentence.
# Jump forward and land on the < character
f<

# Jump forward and land right before the < character
t<You can think of this as "find" for the first one, which lands right on it, and "to" for the second one, which lands right before it.
What's really sick, though is that you can use these as nouns for commands. So just a second ago while editing this sentence I did:
ct,This works for whatever character, e.g. periods, open brackets, parenthesis, regular letters—whatever. So you can just look forward in your text and jump to things or you can know that it's somewhere up there and just got to it wherever it is.
A search reference
- /{string}: search for string
- t: jump up to a character
- f: jump onto a character
- *: search for other instances of the word under your cursor
- n: go to the next instance when you've searched for a string
- N: go to the previous instance when you've searched for a string
- ;: go to the next instance when you've jumped to a character
- ,: go to the previous instance when you've jumped to a character
Moving around in your text
Getting around within your text is critical to productivity. With vim this is both simple and elegant, as it leverages the core principal of vim as language that we talked about above. First, some basics.
Basic motions
We start with use of the home row. Typists are trained to keep their right hand on the j, k, l, and ";" keys, and this is the starting point for using Vim as well.
- j: move down one line
- k: move up one line
- h: move left one character
- l: move right one character
This is a bit strange at first, and it just takes a few minutes of practice to get functional with, but it'll quickly become so natural that you'll be doing it in Microsoft Word and Outlook (it doesn't work there, by the way).
So your right index and middle fingers move you up and down lines, and your index and ring fingers move you left and right by one character.
Moving within the line
You can easily move within the line you're on.
- 0: move to the beginning of the line
- $: move to the end of the line
- ^: move to the first non-blank character in the line
- t": jump to right before the next quotes
- f": jump and land on the next quotes
Moving by word
You can also move by word:
- w: move forward one word
- b: move back one word
- e: move to the end of your word
When you use uppercase you ignore some delimiters within a string that may break it into two words.
- W: move forward one big word
- B: move back one big word
Moving by sentence or paragraph
- ): move forward one sentence
- }: move forward one paragraph
Moving within the screen
- H: move to the top of the screen
- M: move to the middle of the screen
- L: move to the bottom of the screen
- gg: go to the top of the file
- G: go to the bottom of the file
- ^U: move up half a screen
- ^D: move down half a screen
- ^F: page down
- ^B: page up
Jumping back and forth
While you're in normal mode it's possible to jump back and forth between two places, which can be extremely handy.
- Ctrl-i: jump to your previous navigation location
- Ctrl-o: jump back to where you were
Other motions
- :line_number: move to a given line number
- ^E: scroll up one line
- ^Y: scroll down one line
- ^U: move up half a page
- ^D: move down half a page
- ^F: move down a page
- ^B: move up a page
So let's package that all up into one place:
Motion command reference
- j: move down one line
- k: move up one line
- h: move left one character
- l: move right one character
- 0: move to the beginning of the line
- $: move to the end of the line
- w: move forward one word
- b: move back one word
- e: move to the end of your word
- ): move forward one sentence
- }: move forward one paragraph
- :line_number: move to a given line number
- H: move to the top of the screen
- M: move to the middle of the screen
- L: move to the bottom of the screen
- ^E: scroll up one line
- ^Y: scroll down one line
- gg: go to the top of the file
- G: go to the bottom of the file
- ^U: move up half a page
- ^D: move down half a page
- ^F: move down a page
- ^B: move up a page
- Ctrl-i: jump to your previous navigation location
- Ctrl-o: jump back to where you were
Changing Text
Ok, so we've done a bunch of moving within our text; now let's make some changes. The first thing to remember is that the motions will always be with us—they're part of the language (they're modifiers in the vocabulary above).
Understanding modes
The first thing we need to grasp is the concept of modes. It's a bit counterintuitive at first but it becomes second nature once you grok it. Most guides start with this bit, but I find it a bit obtuse to lead with, and I think the transition point from Normal to Insert is a great place to introduce it.
- You start in Normal Mode. One of the most annoying things about Vim for beginners is that you can't just open it up and start typing. Well, you can, but things go sideways pretty quick if you do.
- Normal Mode is also known as Command Mode, as it's where you're usually entering commands. Commands can be movements, deletions, or commands that do these things and then enter into Insert Mode.
- Insert Mode is where you make changes to your file, and there are tons of ways of entering Insert Mode from Normal Mode. Again, don't worry, this all becomes ridiculously simple with a bit of practice.
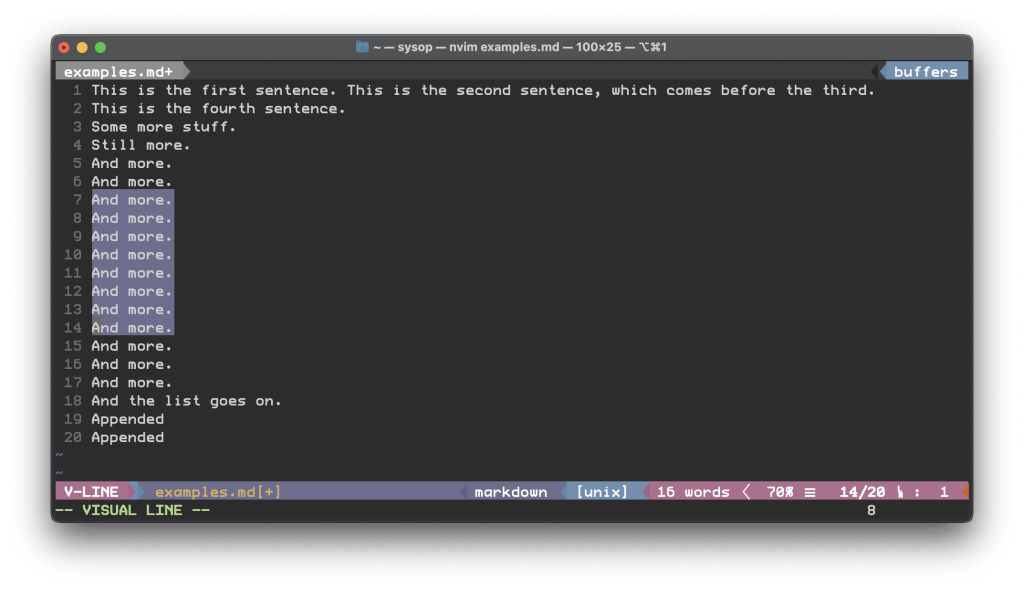
- Visual Mode is a way to select text. It's a lot like Normal Mode, except your movements change your highlighting. You can select text both character-wise or line-wise, and once in one of those modes your movements select more text.
- The purpose of Visual Mode is to then perform some operation on all the content you have highlighted, which makes it very powerful.
- Ex Mode is a mode where you drop down to the bottom, where you get a ":" prompt, and you can enter commands. More on that later. Just know that you can run some powerful command-line stuff from there.
There are some other modes as well, but we won't mess with them here as they tend to live outside primer territory.
Remembering your language
Let's recall our language: Verb, Modifier, Noun. So we're assuming we're starting in Normal Mode, and we're going to switch into Insert Mode in order to change something.
Our verb is going to start us off, and we have a few options. We can change (c), insert (i), or append (a), and we can do variations on these, as seen below.
Basic change/insert options
Let's start with the options here.
- i: insert before the cursor
- a: append after the cursor
- I: insert at the beginning of the line
- A: append at the end of the line
- o: open a new line below the current one
- O: open a new line above the current one
- r: replace the one character under your cursor
- R: replace the character under your cursor, but just keep typing afterwards
- cm: change whatever you define as a movement, e.g. a word, or a sentence, or a paragraph.
- C: change the current line from where you're at
- ct?: change change up to the question mark
- s: substitute from where you are to the next command (noun)
- S: substitute the entire current line
# Change inside sentence
cis

# Go to the beginning of the line and enter insert mode
I

# Start typing right after the cursor
aAs you can see, there are lots of ways to start entering text. There are also some shortcuts (shown above as well) for doing multiple things at once, such as deletion and entering Insert Mode.
# Delete the line from where you're at, and enter insert mode
C

# Delete the entire line you're on, and enter insert mode
SChanging Case
You can change the case of text using the tilde (~) command. It works as you'd imagine—either on the letter under the cursor, or on a selection.
Formatting Text
It's sometimes helpful to format text quickly, such as paragraphs, and this can easily be done with the following command:
# Format the current paragraph
gq apgq works based on your textwidth setting, which means it'll true up whatever you invoke it on to be nice and neat within those boundaries.
The "ap" piece is the standard "around paragraph" text object.
Deleting text
Now that we know how to change text, let's see how to do straight deletes. As you're probably getting now, it's very similar—just a different action to start things off.
Basic deletion options
- x: exterminate (delete) the character under the cursor
- X: exterminate (delete) the character before the cursor
- dm: delete whatever you define as a movement, e.g. a word, or a sentence, or a paragraph.
- dd: delete the current line
- dt.: delete delete from where you are to the period
- D: delete to the end of the line
- J: join the current line with the next one (delete what's between)
Simple enough.
Undo and Redo
You can't have a text editor without undo and redo. As you've probably noticed, Vim does its best to make the keys for the actions feel intuitive, and undo and redo are not exceptions.
- u: undo your last action.
- Ctrl-r: redo the last action
Both commands can be used repeatedly, until you either go all the way back to the last save, or all the way forward to your current state.
Repeating Actions
One of the most powerful commands in all of Vim is the period ".", which seems strange, right? Well, the period "." allows you to do something brilliant—it lets you repeat whatever it is that you just did.
Using the "." to repeat your last action
Many tasks you do will make a lot of sense to repeat. Going into insert mode and adding some text, for example. You can do it once and then just move around and add it again with just the "." Here are a couple of other examples.
# delete a word
dw

# delete five more words
5.Whoa. And wait until you see it combined with Visual Mode.
Copy and Paste
Another text editor essential is being able to quickly copy and paste text, and Vim is masterful at it.
Copying text
Vim does copying a bit different than one might expect. The command isn't c, as one might expect. If you'll remember, c is already taken for "change". Vim instead uses y for "yank" as it's copy command and shortcut.
- y: yank (copy) whatever's selected
- yy: yank the current line
Remember, just like with any other copy you're not messing with the source text—you're just making another…copy…at the destination.
Cutting text
Cutting text is simple: it's the same as deleting. So whatever syntax you're using for that, you're actually just pulling that deleted text into a buffer and preparing it to be pasted.
Pasting text
Pasting is fairly intuitive—it uses the p command as its base. So, if you delete a line using dd, you can paste it back using p.
One thing to remember about pasting is that it generally starts right after your cursor, and either pastes characters/words or lines or columns—based on what you copied (yanked). Also remember that you can undo any paste with the universal undo command "u".
A copy and paste reference
- y: yank (copy) from where you are to the next command (noun)
- yy: a shortcut for copying the current line
- p: paste the copied (or deleted) text after the current cursor position
- P: paste the copied (or deleted) text before the current cursor position
# Switching lines of text
ddpThis is a quick trick you can use to swap the position of two lines of text. The first part deletes the line you're on, and the second part puts it back above where it used to be.
Spellchecking
We'd be in pretty bad shape if we couldn't spellcheck, and vim does it quite well. First we need to set the option within our conf file.
# Somewhere in your ~/.vimrc
set spell spelllang=en_usFinding misspelled words
When you have set spell enabled within your conf file, misspelled words are automatically underlined for you. You can also enable or disable this by running :set spell and :set nospell.
Either way, once you've got some misspellings you can then advance through them and take action using the following commands:
]s - Go to the next misspelled word
[s - Go to the last misspelled word
z= - When on a misspelled word, get some suggestions
zg - Mark a misspelled word as correct
zw - Mark a good word as misspelledI like to add a couple of shortcuts to my ~/.vimrc file related to spelling. The first just makes it easy to "fix" something:
# Fix spelling with ⟨leader⟩f
nnoremap ⟨leader⟩f 1z=This one gets rid of spellchecking when I don't want to see it—like when I'm in creative mode. I can then re-toggle it with the same command.
# Toggle spelling visuals with ⟨leader⟩s
nnoremap ⟨leader⟩s :set spell!⟨CR⟩Substitution
Another powerful feature of Vim is its ability to do powerful substitutions. They're done by specifying what you're looking for first, then what you're changing it to, then the scope of the change.
The basic setup is the :%s
# Change "foo" to "bar" on every line
:%s/foo/bar/g

# Change "foo" to "bar" on just the current line
:s/foo/bar/gNotice the lack of the % before the "s".
There are many other options, but these are the basics.
Advanced
Brilliant. So we've covered a number of basics that any text editor should have, and how Vim handles those tasks. Now let's look at some more advanced stuff—keeping in mind that this is advanced for a primer, not for Kana the Wizard.
Making Things Repeatable
We talked a bit ago about being able to repeat things quickly using the period ".". Well, certain types of commands are better for this than others, and it's important to know the difference.
In general, the idea with repetition using the period "." (or as Drew Neil calls it—the dot command) is that you want to have a discreet movement action combined with a repeatable command captured in the ".".
So let's say that you're adding a bit of text to the end of multiple lines, but you're only doing it where the line contains a certain string. You can accomplish that like so:
# Search for the string
/delinquentNow, whenever you press the "n" key you'll teleport to the next instance of "delinquent". So, starting at the first one, we're going to append some text.
Type A to append at end of line, then type [DO NOT PAY], then press Esc
Ok, so we've done that once now. But there are 12 other places it needs to be done. The "." allows us to simply re-execute that last command, and because we also have a search saved we can combine them.
# Go to the next instance and append the text to the line
n.Text Objects
Text Objects are truly spectacular. They allow you to perform actions (verbs) against more complex targets (nouns). So, rather than selecting a word and deleting it, or going to the beginning of a sentence and deleting it, you can instead perform actions on these…objects…from wherever you are within them.
Hard to explain; let me give you some examples.
Word Text Objects
Let's look first at some word-based objects.
- iw: inside word
- aw: around word
These are targets (nouns), so we can delete against them, change against them, etc.
# Delete around a word
dawSentence Text Objects
- is: inside sentence
- as: around sentence
Those work pretty much the same as with word objects, so imagine you're knee deep into a sentence that you decide suddenly you hate. Instead of moving to the beginning of it and figuring out how to delete to the end, you can simply:
# Change inside a sentence
cisThis nukes the entire sentence and puts you in Insert Mode at the beginning of your new one.
More object types
There are also a number of other object types, which I'll mention briefly.
- paragraphs: ip and ap
- single quotes: i' and a'
- double quotes: i" and a"
I use these constantly when editing code or HTML. Remember the key is that you don't even have to be inside the section in question; you just tell it ci" and it'll delete everything inside the double quotes and drop you inside them in Insert Mode. It's wicked cool.
The same works for a few other types of items, including parenthesis, brackets, braces, and tags (think HTML).
Think about editing an HTML link, where there is the URL within double quotes, and then the link text within tags; this is handled elegantly by vim by doing two commands: ci" and then cit.
A text object reference
Here a list of the objects for your reference:
- words: iw and aw
- sentences: is and as
- paragraphs: ip and ap
- single quotes: i' and a'
- double quotes: i" and a"
- back ticks: i
and a - parenthesis: i( and a(
- brackets: i[ and a[
- braces: i{ and a{
- tags: it and at
Using Visual Mode
Many tricks of the Vim wizard can attract attention, but few create as many pleasurable expletives as skillful use of Visual Mode.
Perhaps the best thing to say about Visual Mode is that it magnifies the power of everything you've learned so far. It does this by allowing you to apply commands to the text that's currently highlighted.
So let's start with how to enter Visual Mode and light up some text. You enter Visual Mode with the "v" key, and there are three different options.
- character-based: v
- line-based: V
- block/column-based: Ctrl-v
Selecting inside containers
Often time you'll be inside some content that is surrounded on both sides by something, such as , . ( { [. You can visually select these things by issuing commands like these:
# Select inside of parenthesis
vi(

# Select inside of brackets
vi[You can also add a number to that to select two levels out (if you're inside a nested set.
# Select everything inside the second tier braces
v2i{You can also use va to select around instead of inside. Remember not to burden your mind with these. They're the same exact nouns and verbs we know from everywhere else.
Character-based visual select
Starting with character-based (using v to enter from Normal Mode), you can use this to select characters, sets of characters, words, etc. I use this far less frequently than line-based (V), but I still use it often.
The main thing to understand here is that now that you're in Visual Mode, your motions are changing what's being highlighted. This means you can do motions like w or ) to expand your selection. The highlighted area is then going to become the target for an action.
Line-based visual select
You enter this mode by pressing the V key from Normal Mode, and from here you then take the actions we'll discuss in a moment.
Column-based visual select
Another option is to select text vertically, which is great for pulling columns of data.
Actions you can perform on visually selected text
It's really your choice, but the most common operations are simply deletion, copy, and paste. Just think of it as highlighting with your mouse—back when you used such things.
# Enter visual mode, select two more words of text, and copy them
vwwyThen you simply go where you want to put them and type p to paste them there.
Or you can do some line-based action.
# Enter line-based visual mode and delete a couple of lines below
VjjdYou can also use text objects, which is seriously sick.
# Visually select an entire paragraph
vip

# Visually select an entire paragraph then paste it down below
vipyjjpDon't panic about how big that command is. Remember, it's language. You can rattle off:
…without any problem, and it's the same with:
Combining visual mode with repetition
Another wicked thing you can do with Visual Mode is apply the . command to execute a stored action against the selection. Let's take the text below for example.
foo
bar
thing
other
yetanother
alsoIf we want to prepend a colon in front of every line, you can simply put one in front of foo, visually select all the lines below it, and then hit the . key.
:foo
:bar
:thing
:other
:yetanother
:alsoBAM!
Not feeling it yet? How about this: your file is 60,000 lines, each with a line like the above, and you have to append the ":" to each of them. What do you do?
# Add the colon to the whole file
0i:⟨Esc⟩j0vG.wut
Ease up, killer. Here are the steps:
- Go to the beginning of the first line and insert a colon
- Go down one line and go to the beginning of the line
- Visually select all the way down the end of the file
- Add the colon to the selection
Done. For the entire file. And remember, you're not going to have to remember to type "ALPHABET AMPERSAND GOBBLYGOOK 25″—no, it's just going to come to you, like falling off a bike. Trust me.
Using Macros
People think macros are scary. They're really not. They really come down to one thing: recording EVERYTHING you do and then doing it again when you replay. Here's a simple reference:
- qa: start recording a macro named "a"
- q: stop recording
- @a: play back the macro
Simple, right? You can have multiple macros stored in multiple registers, e.g. "a", "b", "c", whatever. And then you just play them back with @a or @c or whatever.
Why macros
You may be asking:
If visual selection and repetition with the dot command are so powerful, why use macros at all?
Great question, and the answer is complexity. Macros can do just about anything you can do, so check out this workflow:
- Search within the line for "widget"
- Go to the end of the word and add "-maker"
- Go to the beginning of the line and add a colon
- Go to the end of the line and add a period.
- Delete any empty spaces at the end of the line.
That's a lot of work, and if your file is 60K lines like the last one, it's going to be somewhat painful. Try doing that in Microsof Word, for example.
With Vim however, you simply perform those actions once and then replay it on each line.
Tricks
Let's go through a few tasks that get asked about a lot and/or just save a considerable amount of time.
Remove whitespace from at end of a line
Based on the type of file you're in, you might have some line drama. Here's how to delete those iannoying Ctrl-M characters from the end of your lines.
# Delete the Ctrl-M characters from the end of files
:%s/\s\+$//Changing File Type
set ft=unix
set ft=html
set ft=dosWrapping Content
Using the Surround Plugin you can do some seriously epic stuff in terms of wrapping text with markup.
- cs"': for the word you're on, change the surrounding quotes from double to single
- cs'
⟨q⟩: do the same, but change the single quotes to⟨q⟩tags (surround.vim auto-closes tags) - ds": delete the double quotes around something
- ysiw[: surround the current word with brackets
- ysiw
⟨em⟩: emphasize the current word (it works with text objects!) Want to know what's crazier about that? It's dot repeatable!. - Visual Mode: select anything, and then type S. You'll be brought to the bottom of the window. Now type in what you want to wrap that with, such as
⟨a href="/images"⟩, and then press enter.
Conclusion
So that's it then. There are two things I'd like one to come away with from this guide:
- Vim is learnable
- Vim is powerful
If you are able to become even partially comfortable with the basics covered here I think you will simply enjoy text more—and that's not a minor thing. The more comfortable you are dealing with text, the more comfortable you'll be dealing with ideas, and I think that's nothing less than epic.
Or you can sweep all that rubbish aside and just be one of those people who make others smile orgasmically when they watch you edit a config file—either way, I hope you found this helpful.
If you liked this, check out my other technical primers here.
Notes
- The one book I recommend on Vim is Drew Neil's Practical Vim: Edit Text at the Speed of Thought. It's a must-own for any serious Vim enthusiast.
- I highly recommend Your Problem with Vim is that you don't grok vi. It gives a phenomenal overview of Vim in general as well as a number of nifty tricks.
- If you haven't read Steve Losh's Coming Home to Vim, I highly recommend it.
- Definitely check out Kana the Wizard's True Power of Vim.
- Also check out Drew's Vimcasts.org. They're a great way to see Vim power in action.
- For a concise command resource, check out the Vim Quick Reference.
- Definitely don't forget the Vim Wiki; it's a great resource as well.
- If you're interested in vimscript, definitely check out Steve Losh's Learn Vimscript the Hard Way.
