Auto-Optimizing Images Using Folder Actions
I’ve been trying to keep my images down in size on the site, and there are a few steps that go into that:
Resize to 640px in width
Convert from PNG to JPG
Optimize the image (smaller size)
These three take time to do manually, so I just researched how to do it using OS X’s folder actions, which is part of Automator.
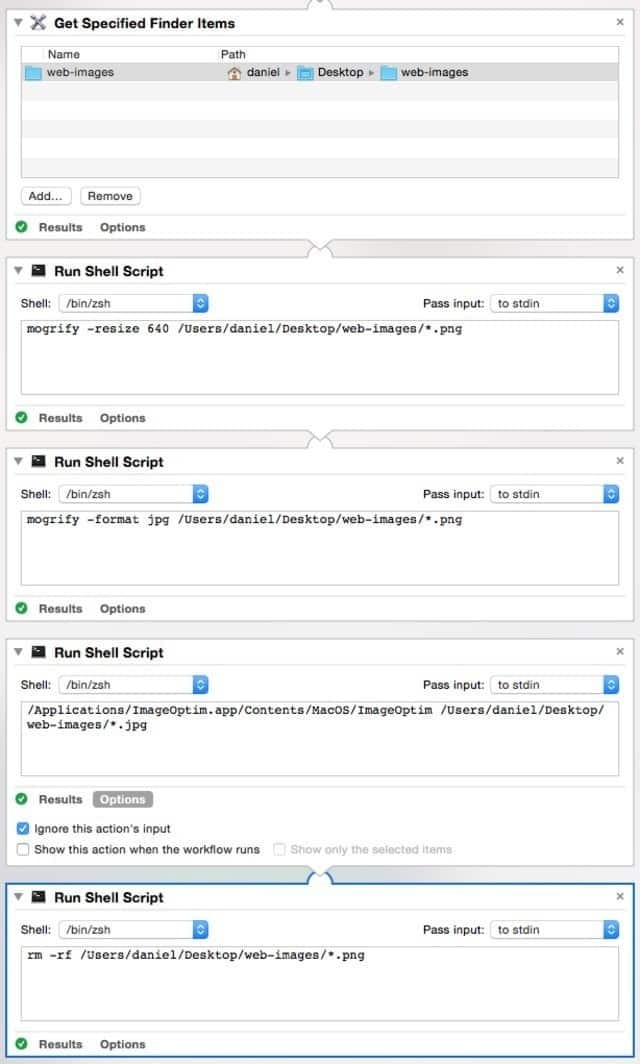
The image on top shows the whole thing. To start, just open Automator and select Folder Action, and then add the steps above. Here are the commands, for anyone interested:
This resizes everything to the width of the site:
mogrify -resize 640 *.png This changes the format to jpeg.
mogrify -format jpg *.png
And this optimizes the smaller jpeg into a compact size (that still looks
good):
/Applications/ImageOptim.app/Contents/MacOS/ImageOptim /Users/daniel/Desktop/web-images/*.jpg
Now I can just drag a big nasty PNG file into the directory and a couple of seconds later I get a perfectly sized and optimized JPG back out!
Savings for me usually comes in at around 40-60%.
Hope this helps.
Notes
You’ll need imagemagick installed, which you can do with Homebrew.